It's been a little more than a month since I last posted, and this post has been a month in the making. I hope you'll find it worth the wait.
On December 10th, Sven and I set out to make something we'd been wanting since we found out most kimchi contained shrimp: a kosher kimchi.
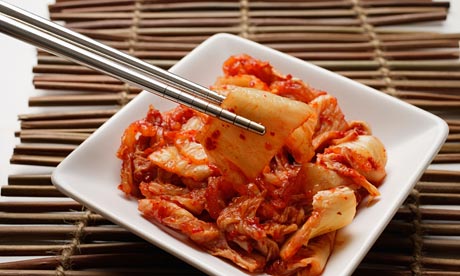
Kimchi is a Korean fermented cabbage dish eaten with most foods (think a spicy saurkraut). While Sven and I were in Korea, we ate kimchi every day and grew quite fond of it. When we discovered most kimchi had shrimp paste in it, we were more than a little bummed out. After a while of researching and comparing recipes, we decided it was time to make some for ourselves.
 |
| Link |
[This is the part of the post where I do the recipe-mandatory "why you should eat this food" bit. If you're already sold on the concept, feel free to skip it. Kimchi is extremely healthy; it contains no processed foods, no/next to no fats, no added sugars, etc etc etc. Because of the fresh ingredients used, it is full of vitamins and minerals. In addition, it is fermented. Fermented foods are healthy for the digestive tract and do not contain artificial preservatives. The garlic and chili used in kimchi act as natural antibiotics and promote healthy heart function. Still not sold? Kimchi is delicious and versatile. The tangy, spicy flavor goes well with most any "Asian" food--plain rice, fried rice, stir fries, sweet dishes, savory dishes, any dishes--and acts as a palate cleanser between different-tasting foods. It also complements western foods like fried chicken, fried fish, and even grilled cheese. It can be eaten along with other foods or as a snack. The spicy sourness is good for both sore throats and for feeling more awake. Still feeling not totally convinced? The process is fun, simple, and a great family-bonding experience, plus, it allows for lessons on chemistry and fermentation. To sum it up, it's fun to make, good to eat, and makes you healthier. What else could you want?]
The Ingredients
We used this one as a base (the instructions are stellar; I suggest you check it out), and altered it to make it more convenient for what we had on hand. The base ingredients for any kimchi recipe is as follows, and the amounts really depend on how much you're wanting to make:
Napa cabbage
Daikon Radish
Hot peppers
Garlic
Green Onion
Onion
Salt
A fruit (we used a juicy yellow pear, but it seems almost any fruit will work)
Ginger
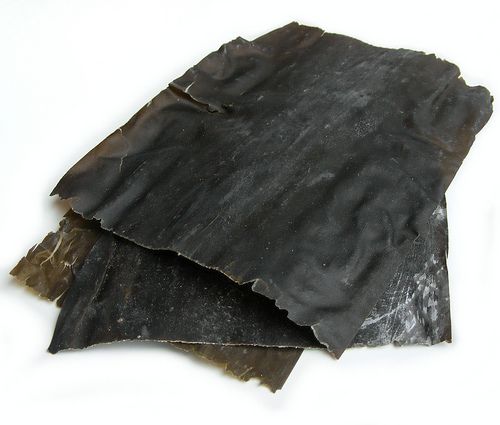
Dried seaweed (kelp)
Soy Sauce
A source of yeast (we used a bit of boiled potato)
Now; these are the base ingredients. Variation is allowed in amounts, types of ingredients, and optional extras. Sesame seeds are popular, as is fish sauce, a kosher alternative to shrimp paste. For us, it was pretty easy to bring these together; the only thing we needed to buy were the cabbage, radish, and pear.
The Beginning
The process of making kimchi is relatively straight forward. The cabbage must be soaked; a broth is made; the broth is added to the flavoring ingredients and blended; the cabbage and radish are chopped; the flavor-sensational paste is rubbed onto the cabbage and radish; leave to ferment. That's all.
First, cut the cabbage until the pieces are about 1" x 2". The size is not extremely important; picture eating it, and make it about mouth-sized. The radish should be cut into little strips--very thin, but it does not need to be soaked.
 |
| Then, cut the cabbage lengthwise |
 |
| 1 cup salt, 8 cups water |
Time for Flavor!
When the broth was suitably flavored, it was time to add the other flavorful ingredients. The garlic, ginger, onion, green onion, peppers, and pear should be peeled as needed and chopped small. Add the broth, soy sauce, and chopped ingredients to a blender and blend until smooth. This is also when the potato is added. Not much is needed--we used about a half of a small, peeled, red potato. The goal of the potato is to add yeast to the mixture to aid the fermentation. It doesn't alter the flavor much, if at all.
A note on these ingredients; there is a lot of leeway in what you use in this step and the amounts. For example, it was suggested that the peppers used should be special "Korean Chili Flakes". We did not have Korean chili flakes. What we did have, however, were dried peppers from our garden.
 |
| Shown Here |
We'd grown a variety of peppers in our garden this summer, and they'd done surprisingly well. We don't eat much spicy food, so, for lack of something better to do, Sven strung them up in our living room, and there they stayed until they were called upon to fulfill their destiny in our kimchi. The goal of the peppers in kimchi is not just heat; they should have a nice flavor as well. We used a combination of the dried chilis and some frozen peppers. The frozen peppers tasted almost like red bell peppers, but they were also very spicy. The chilis had a smoky flavor and a less-pronounced burn. So, whatever nice peppers you have on hand should suffice as long as you enjoy the way they taste. If you don't like spicy things, use less spicy peppers. If you love hot-hot-hot, add something spicier.
 |
| We blended the peppers first so we could test the flavor before we added the other ingredients. |
The amount of blendedness also depends on your own personal taste. It should be smooth enough to rub over the cabbage, but it doesn't have to be baby smooth. The pear helps the texture and adds a nice sweet kick (we only added half a pear; it was very-very flavorful, and we didn't want it to be too sweet). As noted above, we added the ginger/garlic/onions last so we could gauge the pepper mixture first. Another reason we added them last was so they'd be less blended than the rest of the mixture.
 |
| And 'cause the color was nice |
Time to Put it Together
Once the cabbage is soaked, the radish is chopped into small strips, and the paste is blended to satisfaction, it is time to put them together. The paste should be spread over every nook and cranny of the cabbage; coverage must be complete! For this step, gloves are suggested--the burn from hot peppers is not nice. We didn't have gloves, so we put plastic bags over our hands and secured them with hairbands around our wrists (no pictures of this; sorry! Our hands were too goopy). It wasn't ideal, but it worked pretty darn well.
 |
| Note the towel put down to catch any mess |
To make things simpler, you can do the primary mixing with two spoons, and only use the hands-on approach for once it's more mixed. It shouldn't take too long; go over each piece twice, and you'll be good to go.
 |
| About like this |
At this point, feel free to sample! The ideal amount of time (according to the various recipes I read) for kimchi to ferment is three to four weeks. However, first-day kimchi is individual in its flavor and just as tasty. Before it's fermented, the flavors are more individual; you'll be able to taste the pear, garlic, peppers, and ginger separately.
Chances are, after mixing, you'll have a little leftover sauce. Don't throw it out! It can be added to other dishes for a spicy flavor, or, if you have any leftover radish, you can also make radish kimchi; Simply cut the radish into chunks and add the sauce--no soaking required.
 |
| the radish kimchi |
 |
| Our set up. If you look closely, you can see the plastic wrap in the red-topped container. |
The Wait
We, as you can see, actually made three containers of kimchi. The bowl, for the 3-4 week kimchi, the red-lid, for the radish kimchi, and the blue-lid, for the 3 day kimchi. Just like how first-day kimchi has its own special flavor, so does 3-day kimchi. It'll have a slight fermented flavor, and the individual ingredients will be slightly more blended than first-day kimchi. We made some Bulgogi to celebrate and taste the 3-day kimchi.
I will admit; I was little apprehensive. "Fermentation? Like beer? Doesn't that take...I dunno...a degree?". I wasn't sure how well it would work. What if the kimchi tasted nasty? What if it was slimy? What if it just tasted "off"? However, making kimchi is really just this simple. It was delicious.
A note: as we discovered, the cabbage-kimchi does not have a strong smell, no matter where you are in the fermentation process. The plastic wrap and container lid is enough to keep the smell contained. The radish, however, is very pungent. Not to be crude, but it's a bit like a fart, or cooked eggs. If you want to make radish kimchi (it has all the benefits of kimchi, and a crunchier texture), but you don't want your home to smell, put it in an unused room or closet.
After three weeks, the kimchi will be ready to be eaten and stored. It will have a more orange color, and a slightly spicy, vinegar smell.
 |
| After three weeks; compare to the just-mixed picture. |
To store kimchi, it's another "anything-goes" sort of thing. You can keep it in a bowl, container--whatever you want. We opted to put it into empty pickle jars. Once in the refrigerator, the fermentation will mostly stop. The flavor will get slightly stronger over time, but it can be stored for as you want.
 |
| At this time, the left jar has already been eaten, and we're carefully conserving the right jar. |
For some more kimchi sources, check out these links:
Video: For the visually oriented and/or those interested in making large quantities of kimchi.
Recipe: This is the same recipe I linked above, for a more precise set of instructions.
Kimchi Jiggae Recipe: If you want to turn kimchi into a main dish, check out this soup recipe.
History of Kimchi: For those of you interested in history and culture.
Thanks for reading, and good luck with your kimchi endeavors!